AWS ECS & AWS Fargate
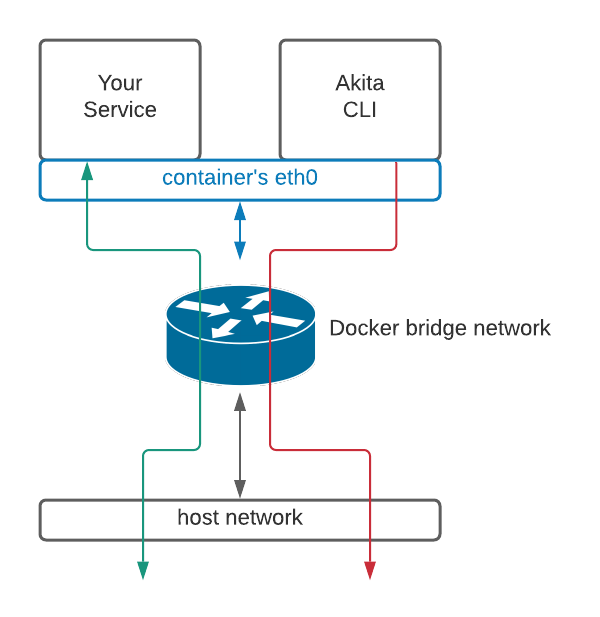
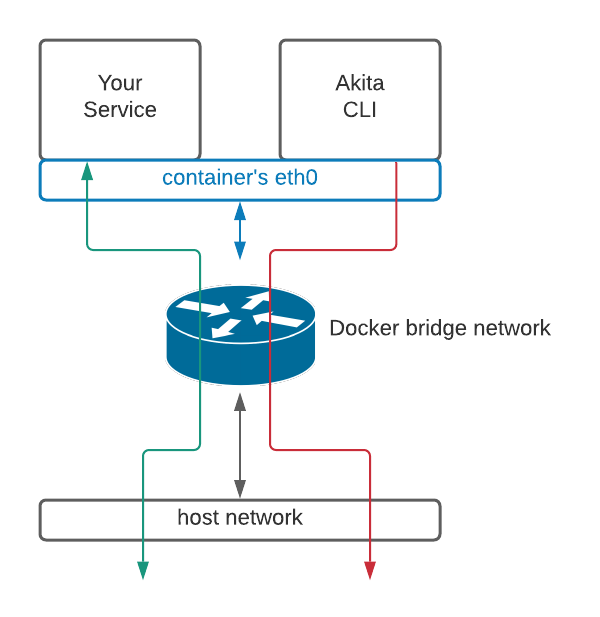
Getting started with Akita is as simple as dropping our Agent into your Docker container. Below are instructions for installing the Akita Agent as a sidecar in each Amazon Elastic Container Service (ECS) and Amazon Fargate container you deploy.
If you have many task definitions, you may want to attach the Akita Agent to the host network rather than deploying many sidecars. See AWS ECS (via host network) for instructions on how to do that.
Akita Account Required
You must have an Akita account to use Akita. You can create an account here.
To set up the Akita Agent in AWS ECS or Fargate you have two options:
The ECS Add command automates the installation of the Akita Agent in ECS and Fargate. If you want to carry out these steps on the AWS console instead, or prefer to install manually, choose Modifying the task definition by hand.
Add Command
Using our ECS Add command, you will set up the Akita Agent by:
- Creating an Akita Project
- Generating an API key for the Akita Agent
- Running the ECS Add command
- Verifying that the Akita Agent is working
Create a project
Log into the Akita App, and go to the Settings page.
Enter a project name and click "Create Project". We suggest naming the project after your app or deployment stack.

Give your project a name that's easy to remember – you'll need it later, when you start the Akita Agent on the CLI.
Generate API key
On the same Settings page, locate and click the “API Keys” tab. Click the “Set up the Akita client” button. Copy your API key secret into your favorite password manager or somewhere else you can easily access it. Also note your API key, as you will need it later.

Run the ECS Add command
The easiest way to run the Akita Agent is via docker run. Run the following command using the API Key ID and secret, as well as project name, you created above. Your command like should look like this:
docker run --rm -it \
  -e AKITA_API_KEY_ID={key id} \
  -e AKITA_API_KEY_SECRET={key secret} \
  -v ~/.aws:/aws:ro \
  akitasoftware/cli:latest \
    ecs add --project {your project}
The option -v ~/.aws:/aws:ro maps the directory containing your AWS credentials into the container so that the Agent can use them to perform actions on your behalf. (The necessary permissions are listed below.)
The CLI will interactively prompt you for several pieces of information, and query AWS to find out what is available.

- Enter the AWS profile with the credentials you want to use. If you only have one in your
.aws/credentialsfile, just hit enter. - Select the region in which your ECS application runs.
- You will be presented with a list of task definitions. Select the one you want to install Akita on. We will warn you if the Akita Agent is already present.
- You will then be presented with a list of services running the task definition. Select the service to restart once Akita has been added to the task definition, and Akita will start to monitor that service.
If at any point you make a mistake, just select "go back to previous step" or hit Ctrl+C to exit.
You will be presented with the changes that will be made for you to review; enter "Y" to proceed.
Once accepted, the CLI will create a new revision of the task definition that includes the Akita Agent as a sidecar, leaving all other settings unchanged. After the task definition has been updated, Akita will update the service you selected to use the updated task definition. Finally, the CLI will monitor the status of the service to ensure that the new deployment which includes the Akita Agent sidecar comes up correctly.
Troubleshooting
If the service does not start correctly, please contact us for help. No need to worry, though, the old task definition should still be running. So you can delete the new task definition that was created by Akita; it will have an
akita.software:created_bytag to help you identify it.
AWS Permissions needed
The Akita CLI needs access to the following permissions in order to install Akita in ECS. If the profile you selected lacks any of these permissions, the CLI output will show an error message with which action it was attempting to perform.
The AmazonECS_FullAccess policy provided by Amazon is a superset of these actions; you could add that entire policy as an easy way to ensure your permissions are sufficient, if they are not already.
| Action | Resource | Purpose |
|---|---|---|
ec2:DescribeRegions | * | Find the list of AWS regions you have enabled. (If not present, defaults to a precompiled list.) |
ecs:ListClusters | * | Find the available ECS clusters. |
ecs:DescribeClusters | , or restricted to account like `arn:aws:ecs:::cluster/* | Look up the names of the available ECS clusters. |
ecs:ListTaskDefinitionFamilies | * | Find the available task definitions. |
ecs:DescribeTaskDefinition | * | Read the existing task definition in order to copy it. |
ecs:RegisterTaskDefinition | * | Write a new version of the task definition. |
ecs:ListServices | * | Find the available services. |
ecs:DescribeServices | *, or restricted to your account, or restricted to the cluster you selected | Identify which services are using the task definition you selected. |
ecs:UpdateService | *, or restricted to your account, or restricted to the cluster you selected | Update and restart the service using the new task definition. |
ecs:TagResource | *, or restricted to your account, or restricted to the cluster you selected | Mark the service as having been updated by Akita. |
Verify
In the Akita web console, check out the incoming data on the Model page. You should see a map of your API being generated as the Akita Agent gathers data.
Then check out the Metrics and Errors page to get real-time information on the health of your app or service.
If everything has been set up successfully, your Akita deployment will look like this:

By Hand
To install the Akita Agent manually on AWS ECS and Fargate you will need to use the AWS console, and you will do the following:
- Create an Akita Project
- Generate an API key for the Akita Agent
- Add to the task definition
- Launch the task definition
- Verify
Once the task definition is saved, update your service as you ordinarily would. The Akita Agent will automatically start capturing traffic, and upload it for analysis.
4. Verify that the Akita Agent is working
Create a project
Log into the Akita App, and go to the Settings page.
Enter a project name and click "Create Project". We suggest naming the project after your app or deployment stack.

Give your project a name that's easy to remember – you'll need it later, when you start the Akita Agent on the CLI.
Generate API key
On the same Settings page, locate and click the “API Keys” tab. Click the “Set up the Akita client” button. Copy your API key secret into your favorite password manager or somewhere else you can easily access it. Also note your API key, as you will need it later.

Add to task definition
Go to the "Elastic Container Service" portion of the AWS web console and select the Task Definitions.
Within the containerDefinitions section of your task, add a new section containing the Akita Docker image as shown below.
Fill in the project name and the API key that you created earlier.
Specify a logConfiguration section in order to see the output from the Akita Agent. Use the destination where you store your application logs, or store them separately.
...
"containerDefinitions": [
  ...
  {
        "name": "akita",
        "image": "public.ecr.aws/akitasoftware/akita-cli:latest",
        "entryPoint": ["/akita", "apidump", "--project", "{project name}"],
        "environment" : [
             { "name" : "AKITA_API_KEY_ID", "value" : "{key id}" },
             { "name" : "AKITA_API_KEY_SECRET", "value" : "{key secret}" }
         ]
    }
]
The Akita API secret can also be stored in an AWS Secret instead.
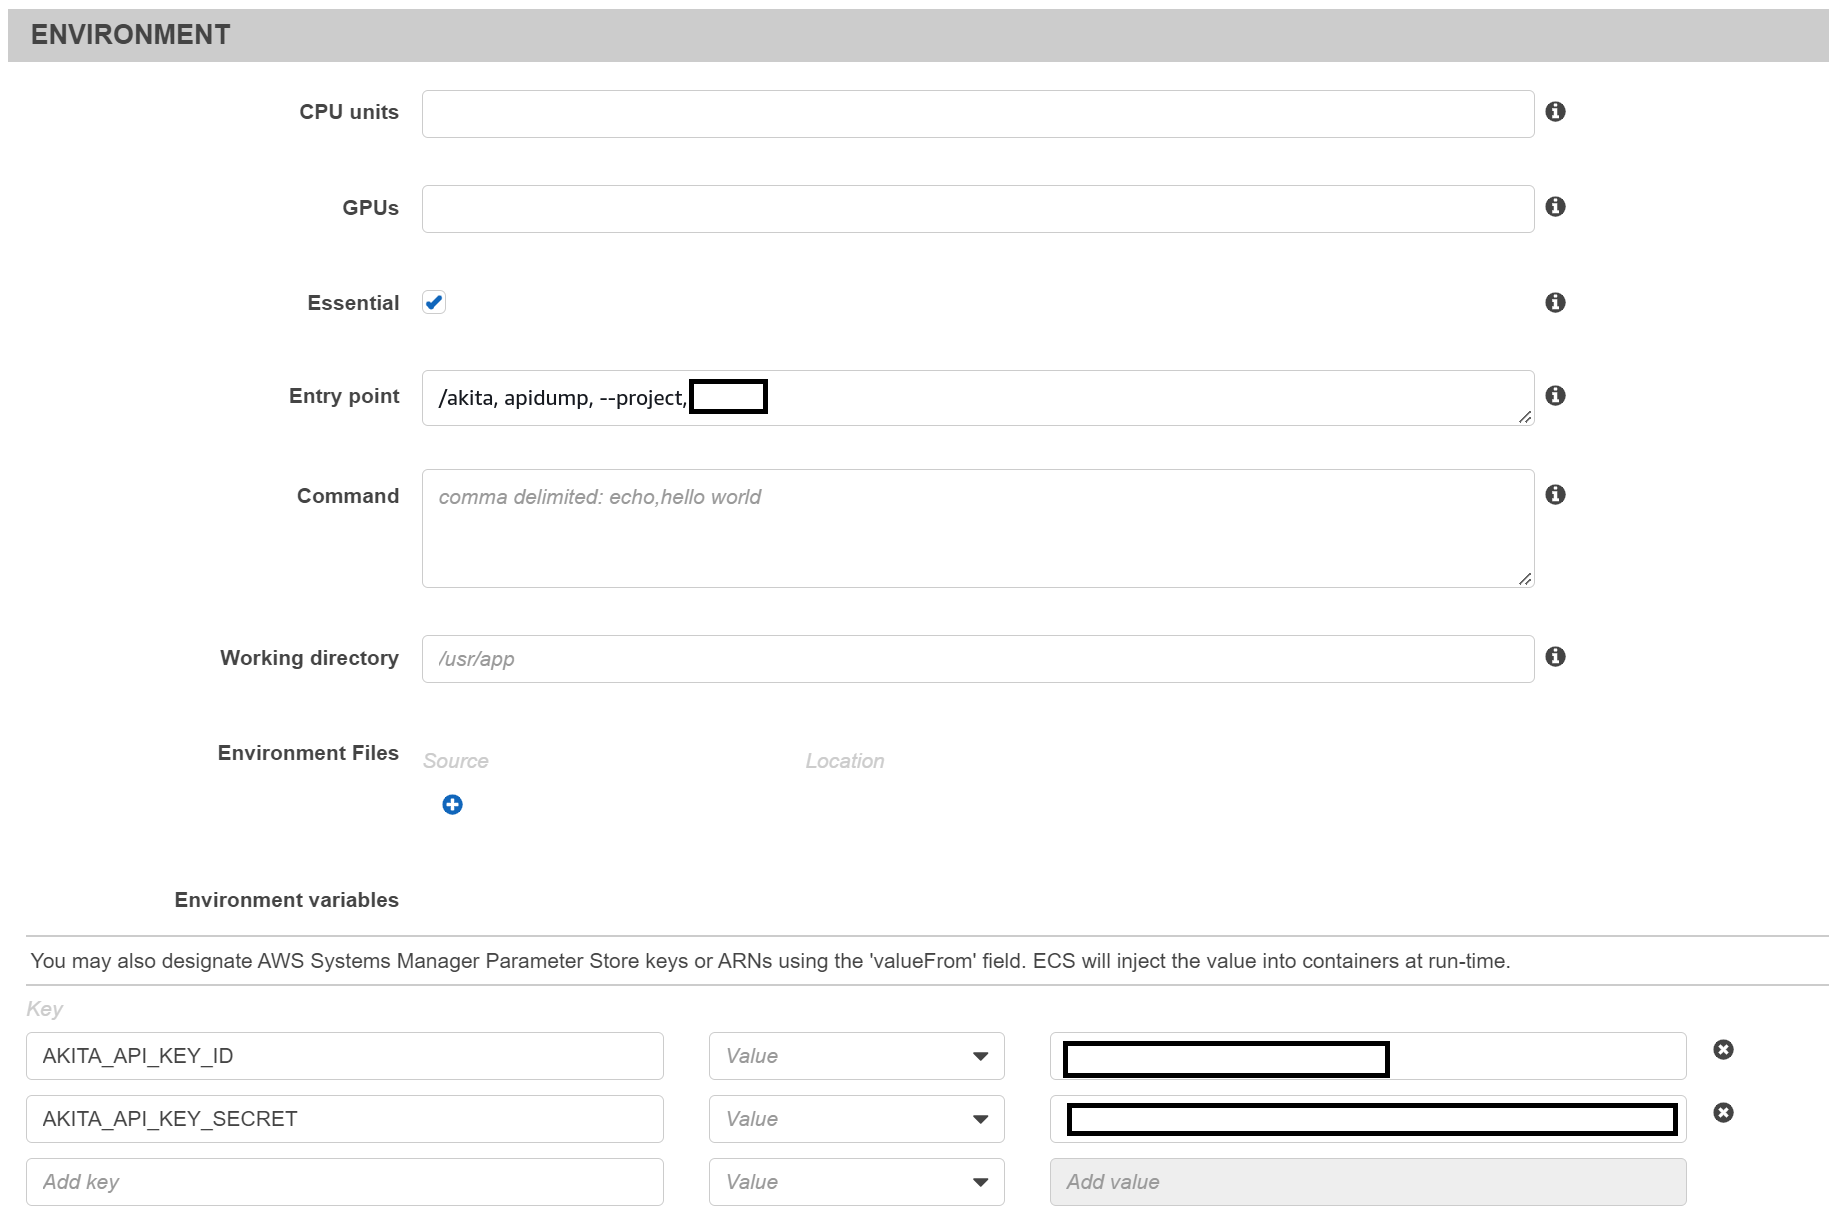
If you edit the task definition from the console, the settings look like the following, though please note that the entry point is comma-separated on the console /akita,apidump,--project,{project_name}.


Launch task definition
Once the task definition is saved, update your service as you ordinarily would. The Akita Agent will automatically start capturing traffic, and upload it for analysis.
Verify
In the Akita web console, check out the incoming data on the Model page. You should see a map of your API being generated as the Akita Agent gathers data.
Then check out the Metrics and Errors page to get real-time information on the health of your app or service.
If everything has been set up successfully, your Akita deployment will look like this:

Updated almost 3 years ago