
[Beta] Docker Desktop Extension
Getting started with Akita is as simple as running Akita in Docker Desktop. Below are instructions for utilizing Akita's Docker Desktop Extension to run Akita.
To set up Akita:
- Install Akita's Docker Desktop Extension
- Complete onboarding in the Akita web app
- Start the Docker Desktop Extension
- Verifying that the Akita Agent is working
- Updating Agent Settings
If you have any problems getting Akita started, check out the troubleshooting section below.
Akita Account Required
You must have an Akita account to use Akita. You can create an account here.
Install Docker Desktop Extension
Install the Akita Extension from the Docker Desktop Marketplace.
Alternatively, you can install our extension from your command line by running:
docker extension install akitasoftware/akita-docker-extension:latest
Verify that the Extension has been installed successfully by checking that it appears in your Docker Desktop sidebar under Extensions
Complete Akita onboarding in the Akita web app
Log in to Akita App, and click “Get Started” to go through our onboarding flow. If you already have an Akita account, you can access our onboarding tool here.

Docker Desktop links
All the links to the Akita app within this document are customized for Docker Desktop users. If you access the Akita app and onboarding flow another way, click "Docker Desktop setup" in the top right corner of the Onboarding view to switch to the Docker Desktop instructions.
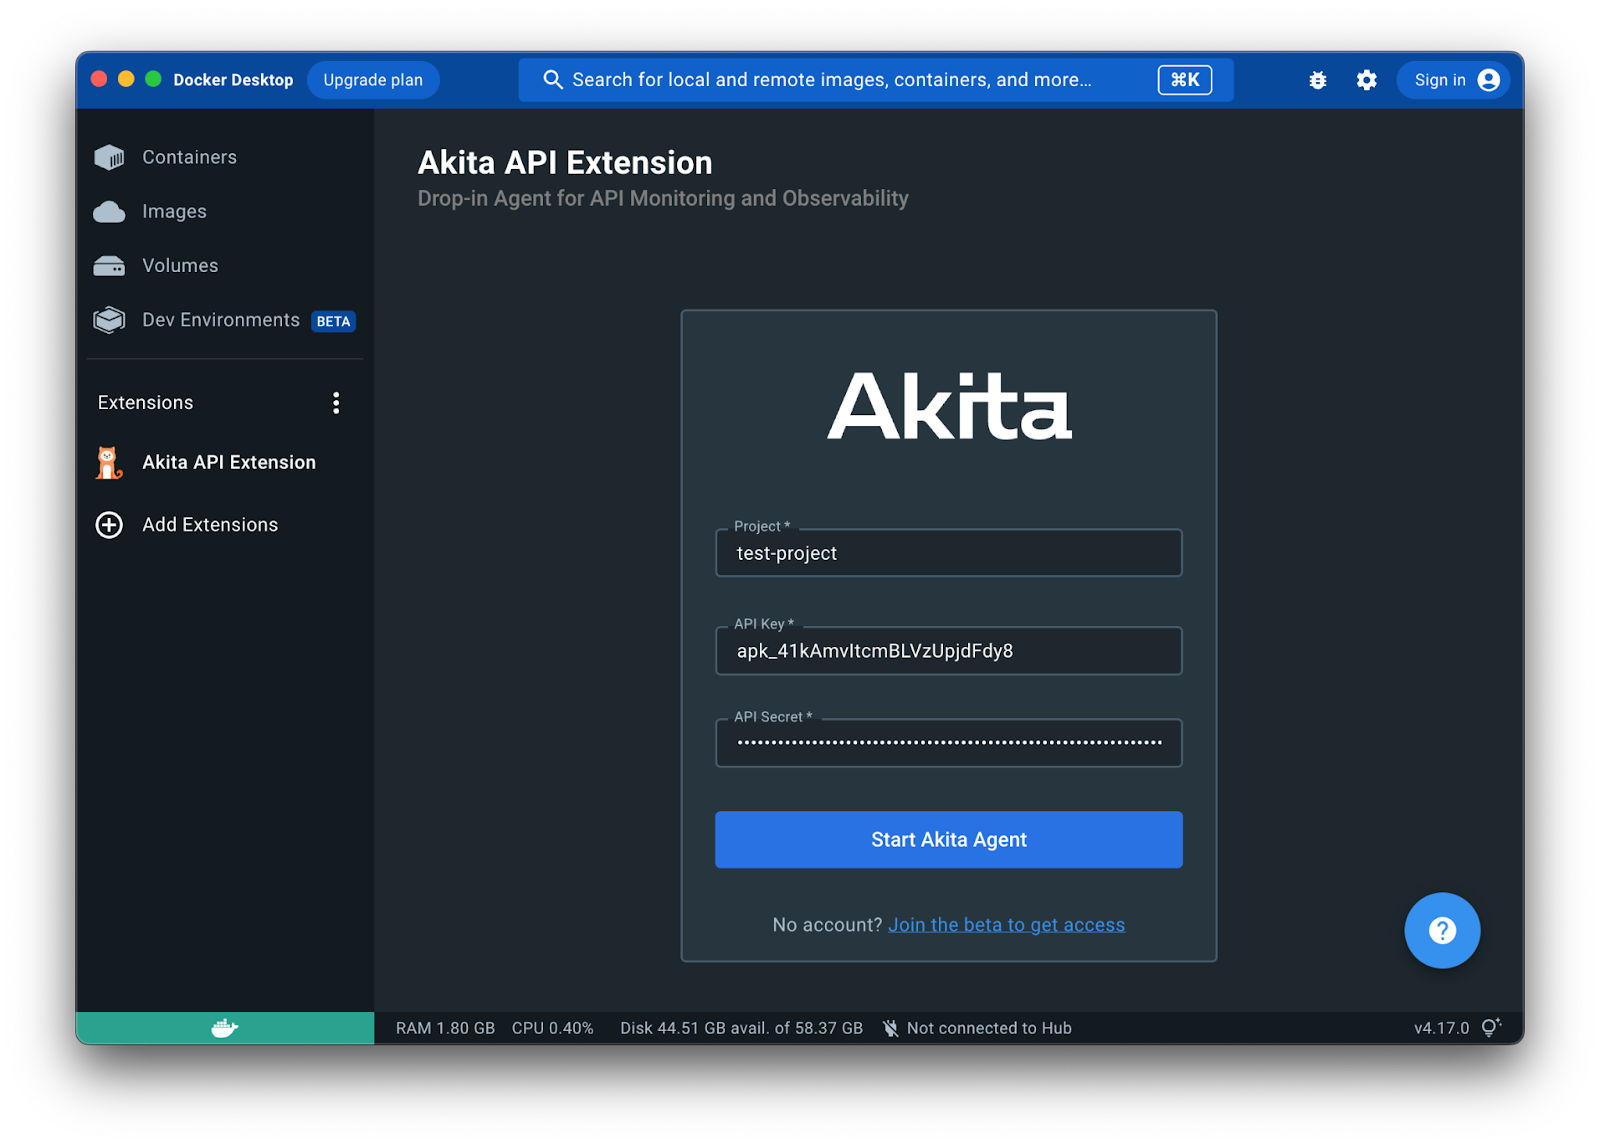
Start the Docker Desktop Extension
To start Akita in Docker Desktop, navigate to the Akita Extension and and provide the project, API key, and API secret created in Akita's onboarding flow.
Then click Start Akita Agent to start collecting traffic.
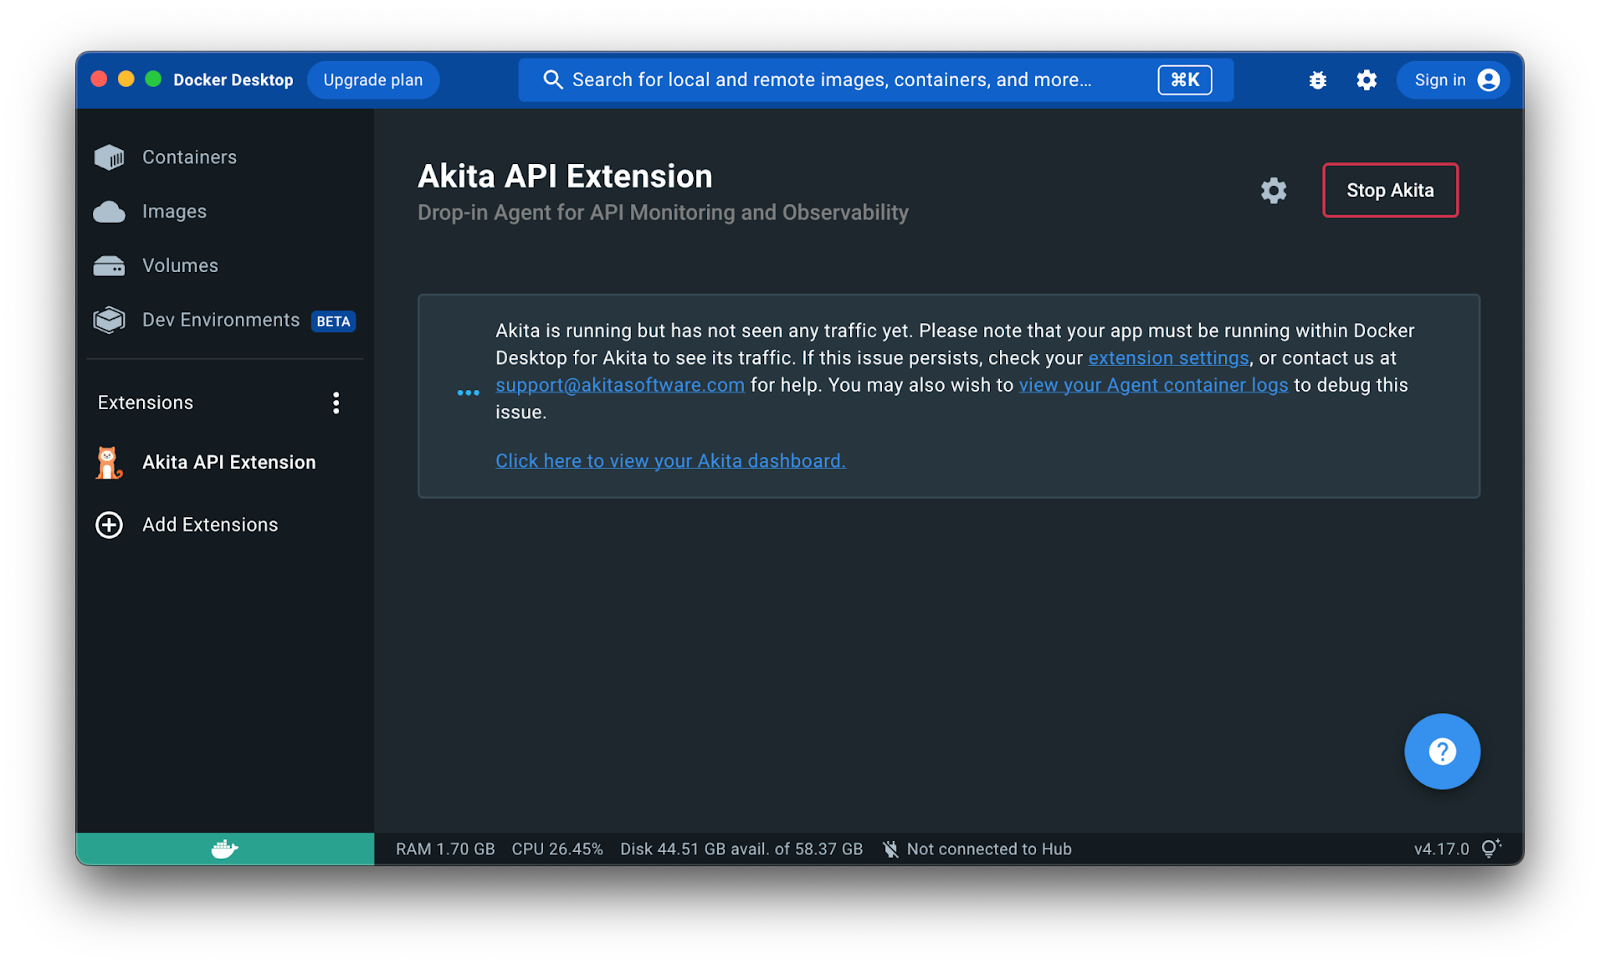
Verify
In Docker Desktop, a new screen will appear that allows you to track the status of the running Akita Agent. Initially, it will likely reflect that Akita has not seen any traffic, as in the following example:
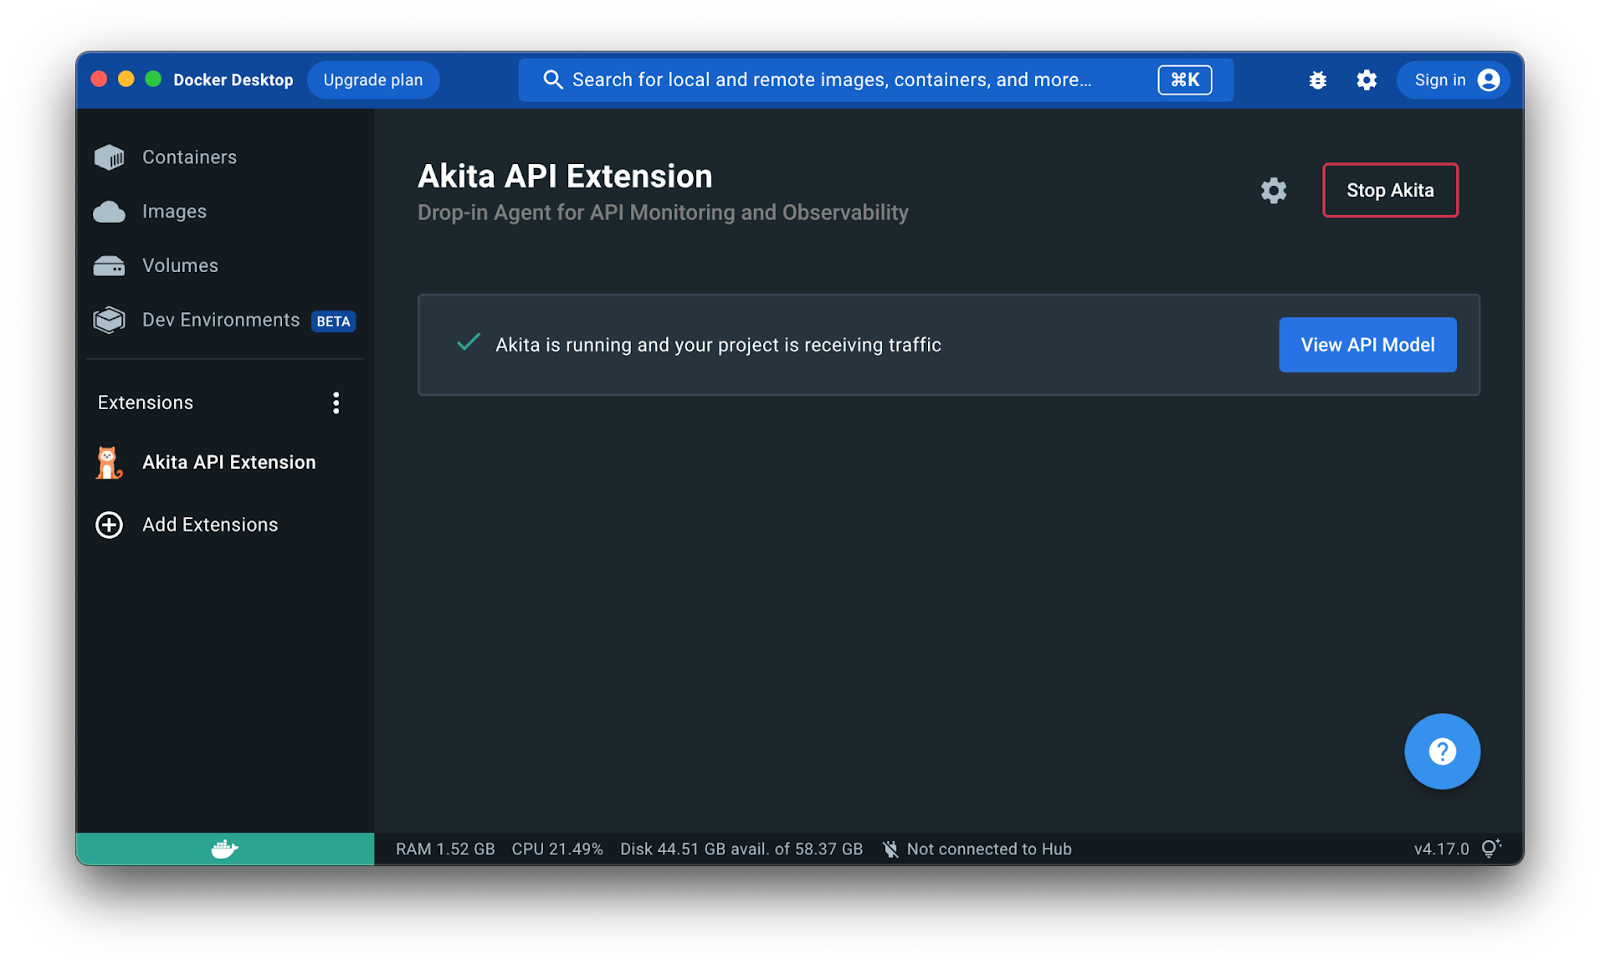
Once the Agent is seeing traffic and reporting it to the Akita web service, the Extension will show a green check mark, and Akita will begin building a model of your data. To see it, click the “View API Model” button.
In the Akita web console, check out the incoming data on the Model page. You should see a model of your API being generated as the Akita Agent gathers data.
Then check out the Metrics and Errors page to get real-time information on the health of your app or service.
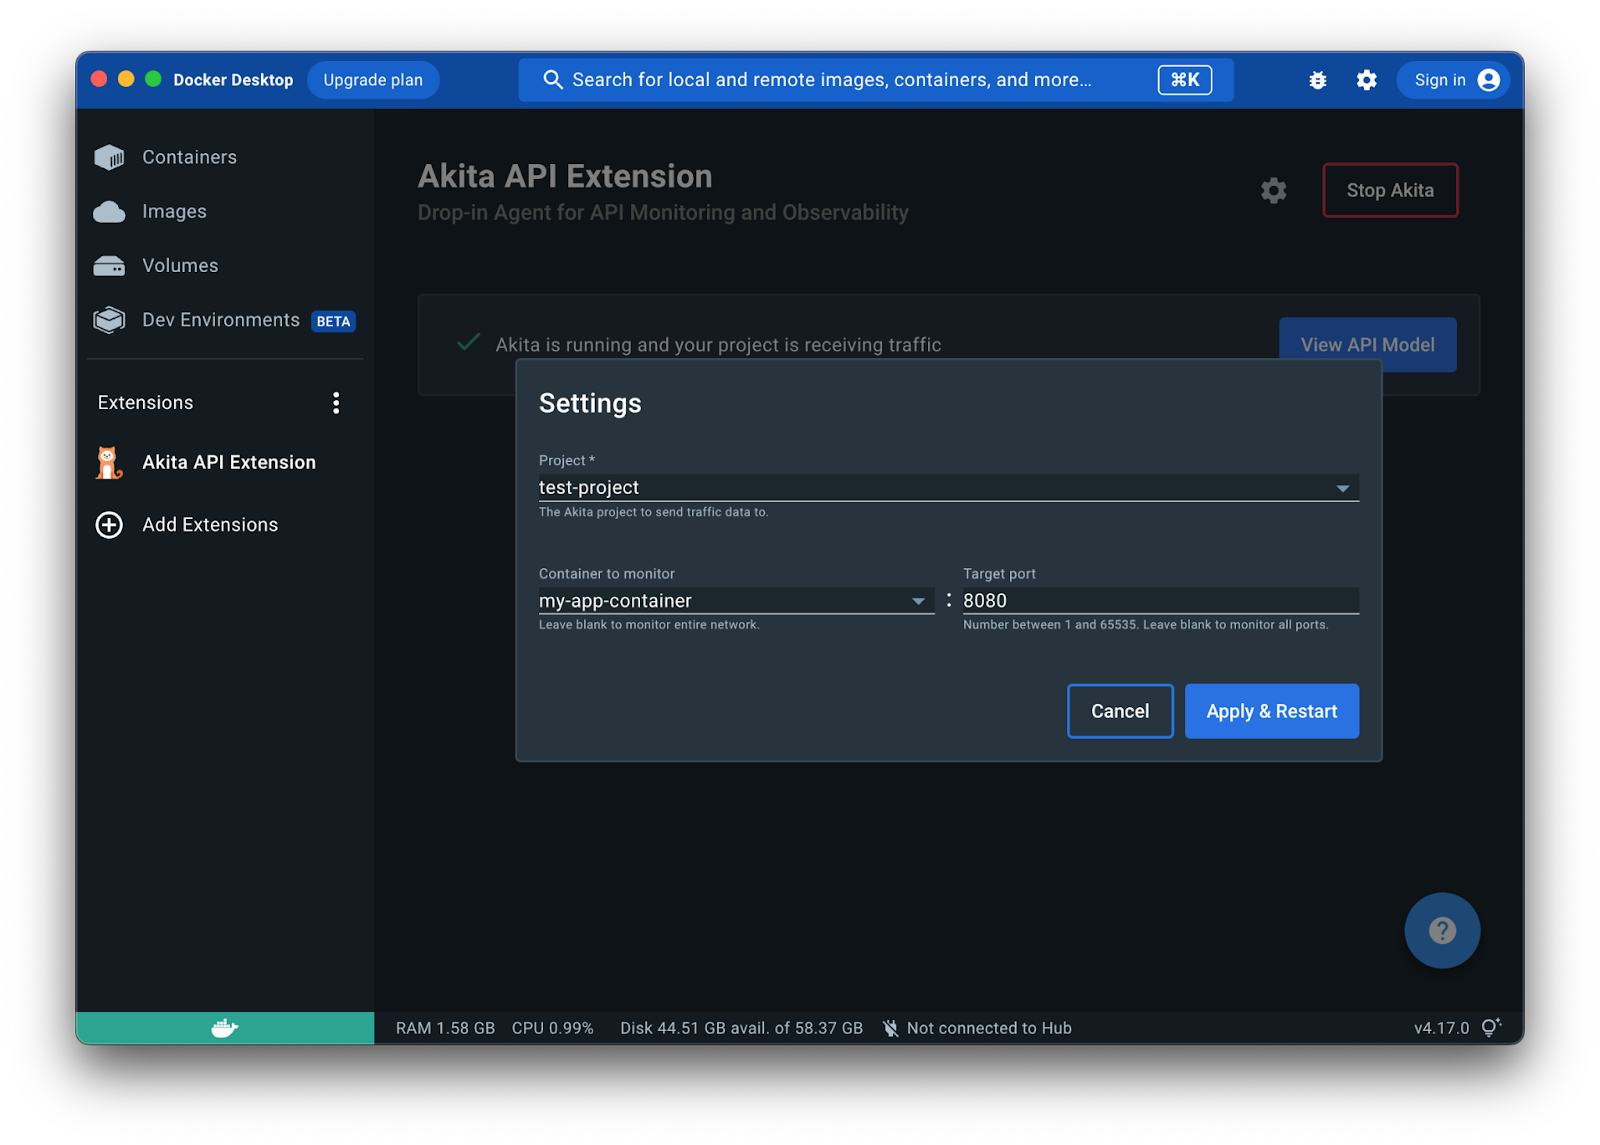
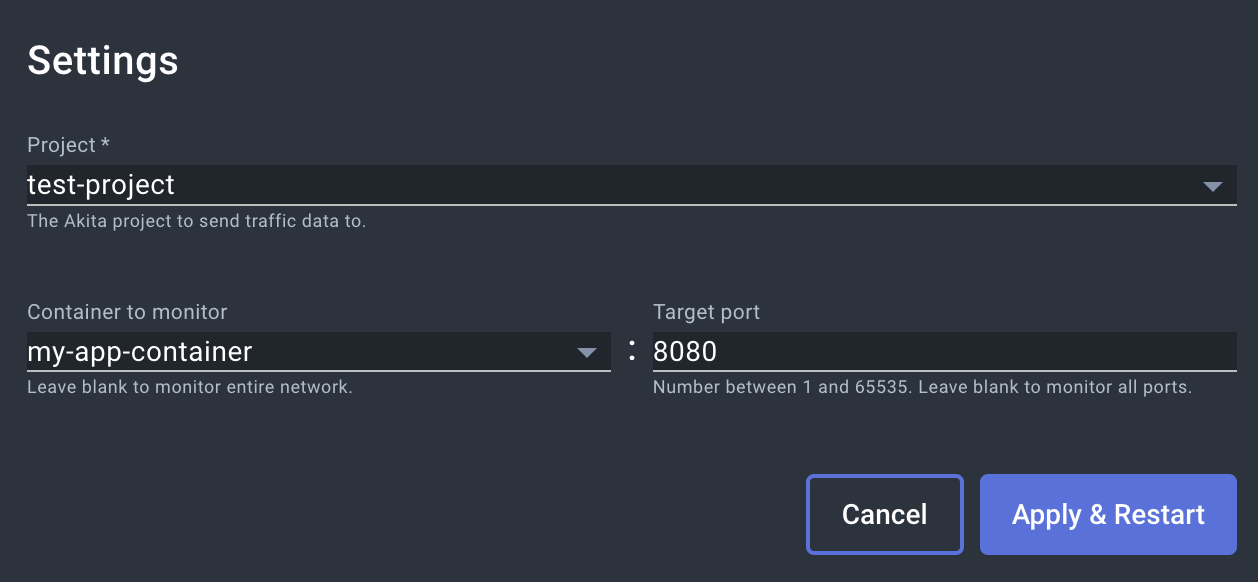
Update Settings
After the Agent has started, you may like to change your targeted project or traffic filters. To do this, click on the gear icon, update your desired settings, then press Apply & Restart.
Troubleshooting
First, verify that you are running the latest version of Docker Desktop by navigating to Preferences > Software Updates in the Docker Desktop app.

If you are running the most recent version, make sure that your app or service is running and receiving traffic. If you don't run your app or service from Docker Desktop, Akita won't see any traffic.
Updated about 3 years ago