Managing Teams
Akita is more fun with friends! Up to this point, we've focused on the basics of generating an API specification, but we haven't yet discussed how to go about sharing that base with teammates. Luckily, Akita Teams was designed to support effortless collaboration.
Getting Started
Now we'll show you how to:
- 💌 Invite a User to Join Your Team
- 📨 Accept an Invitation as a New User
- 📬 Accept an Invitation as an Existing User
Team Membership Limitations
Users can only belong to 1 team at a time. To join another team, the user will need to leave their current team.
Invite a User to Join Your Team
Navigate to the Teams page
To invite a user to join your Team, start by heading over to the Akita Console and navigating to the 'Settings' page by clicking the gear icon in the sidebar, and then clicking on the "Team" tab. (Or just click here).
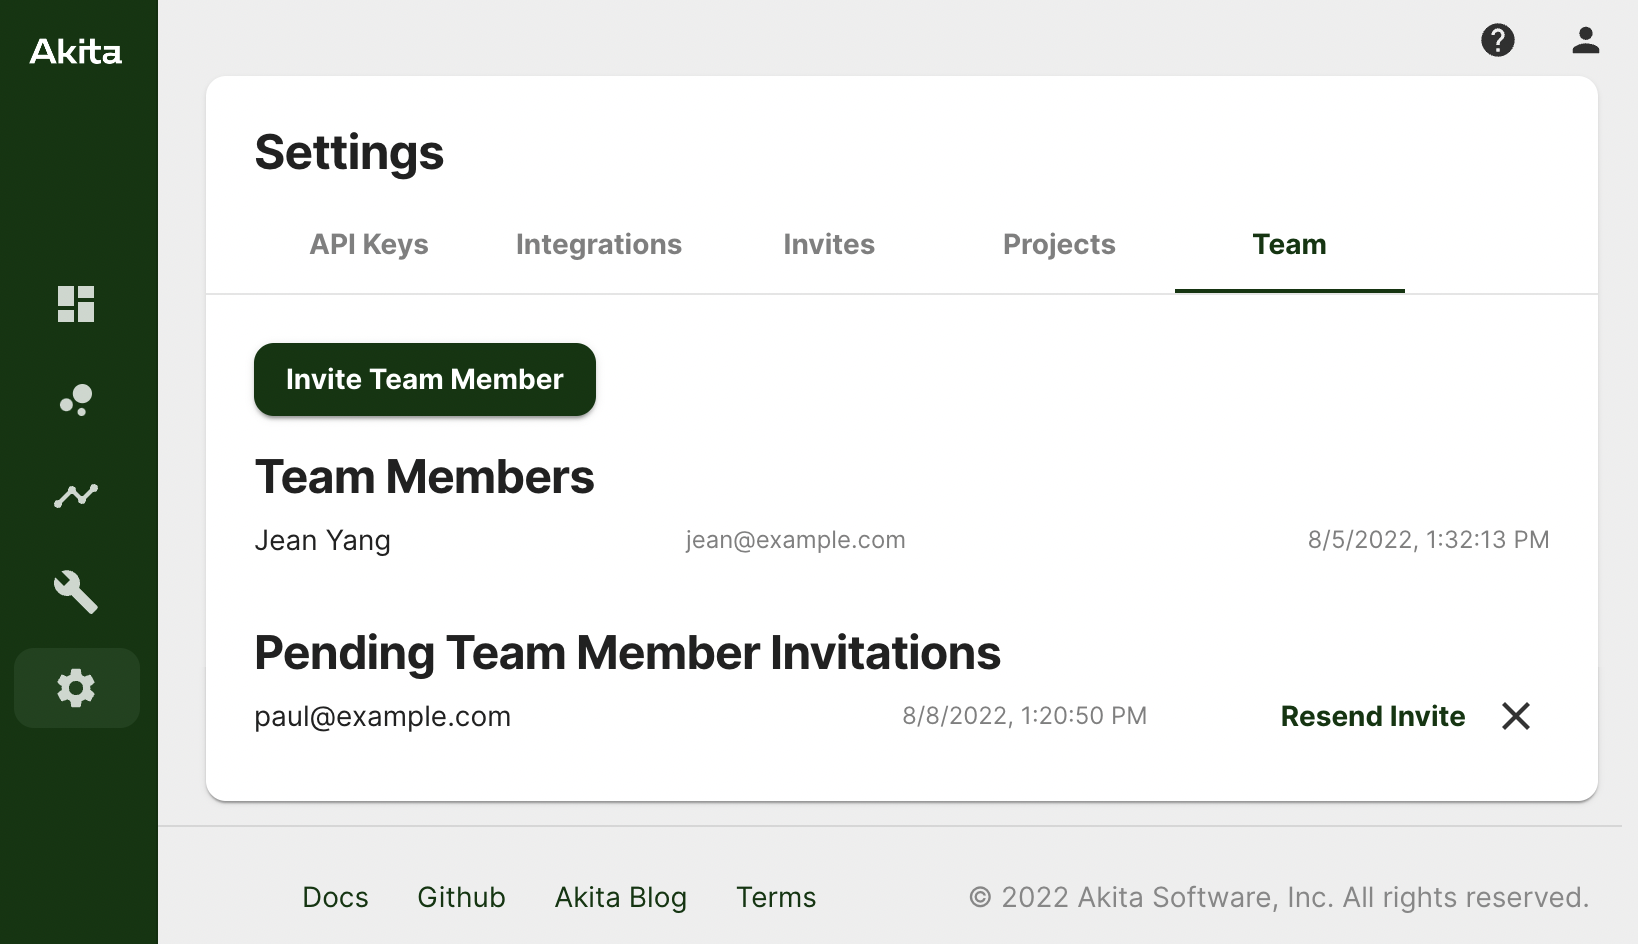
Team Settings Page
Send an Invite
The Team page shows you all of your current team members and pending invitations. Click the "Invite Team Member" button to invite a new user.
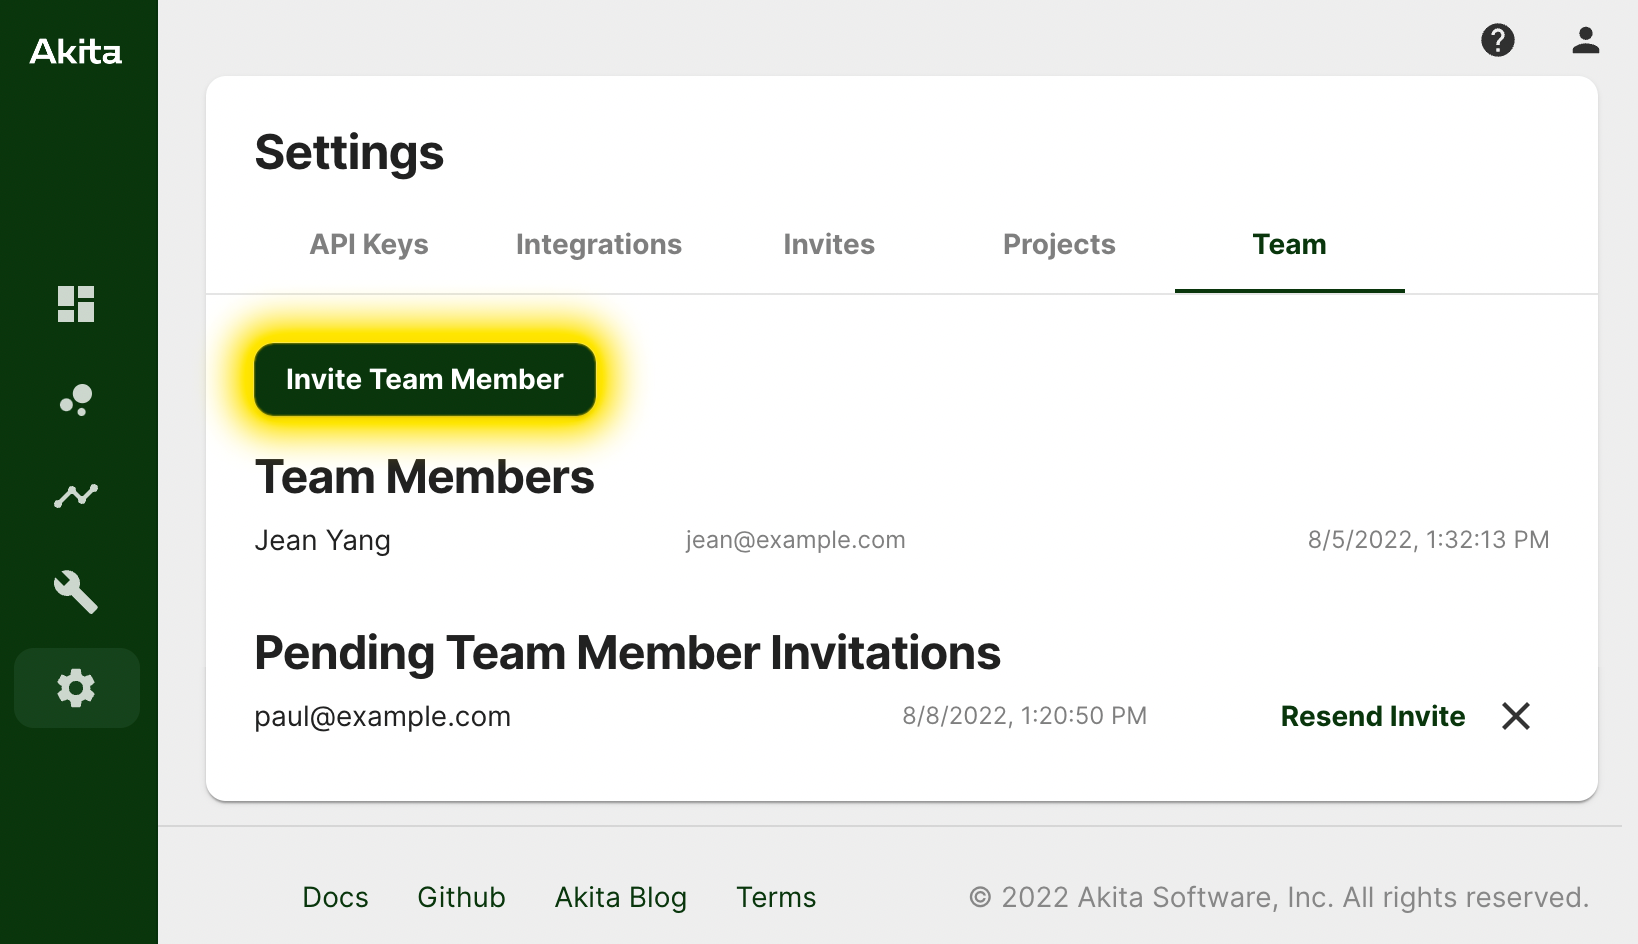
Team Settings Page with "Invite Team Member" button highlighted
In the 'Send Invite' dialog, you can provide the name and email address of the user you would like to invite. Once you've completed the form, click "Invite" to invite the user.
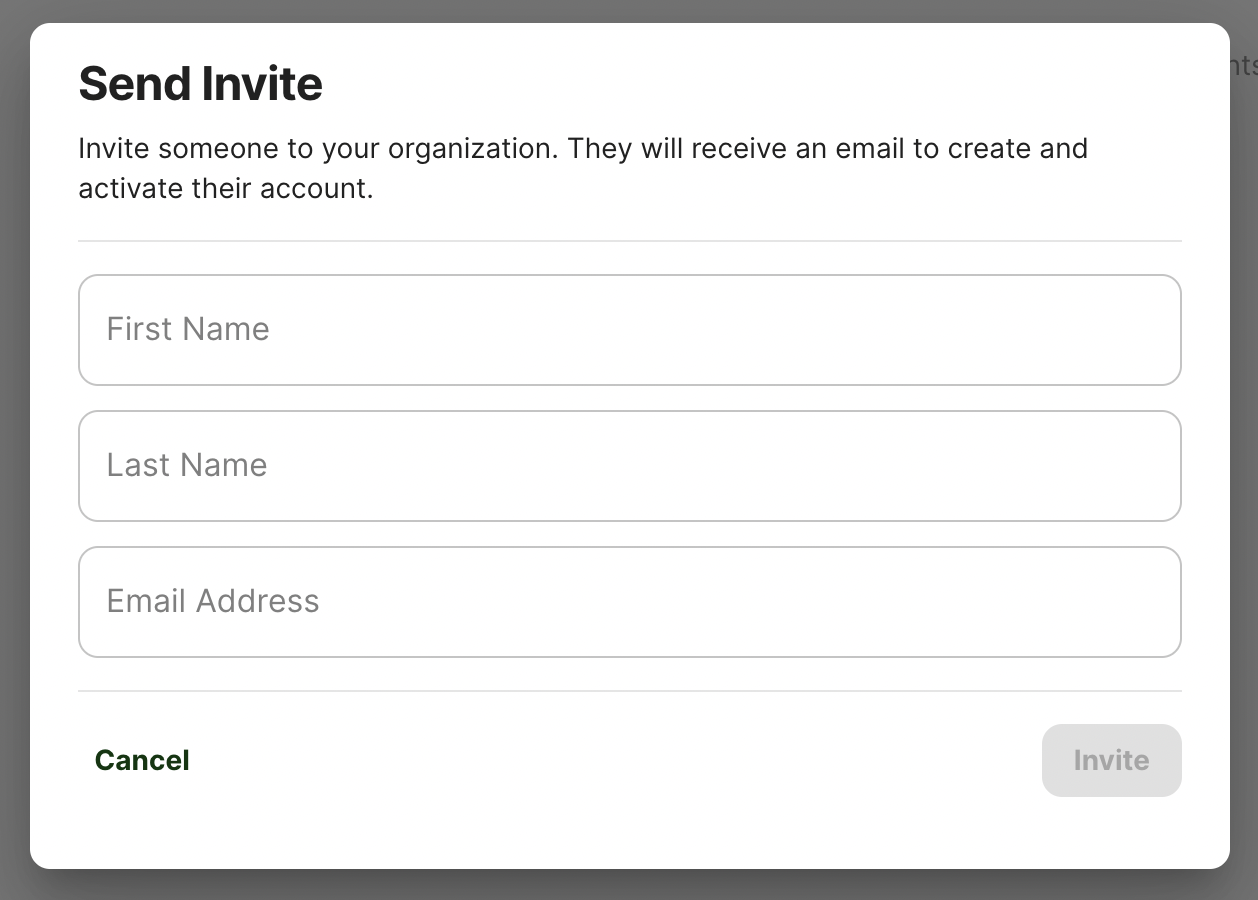
Manage Invitations
The Team page also allows you to manage pending Invitations after they have been sent. Under the "Invitations" header, you will see a list of all your pending Invitations. To resend an invite, simply click "Resend Invite" on the appropriate invitation. You can also revoke an invitation by clicking on the "X."

Accept an Invitation as a New User
Accept the Invitation
New friends are often the best kind! When you invite a new user to Akita, they will receive an email asking them to accept your invitation and activate their new account. To start the process, the invitee needs to click the "Activate Akita Account" button.
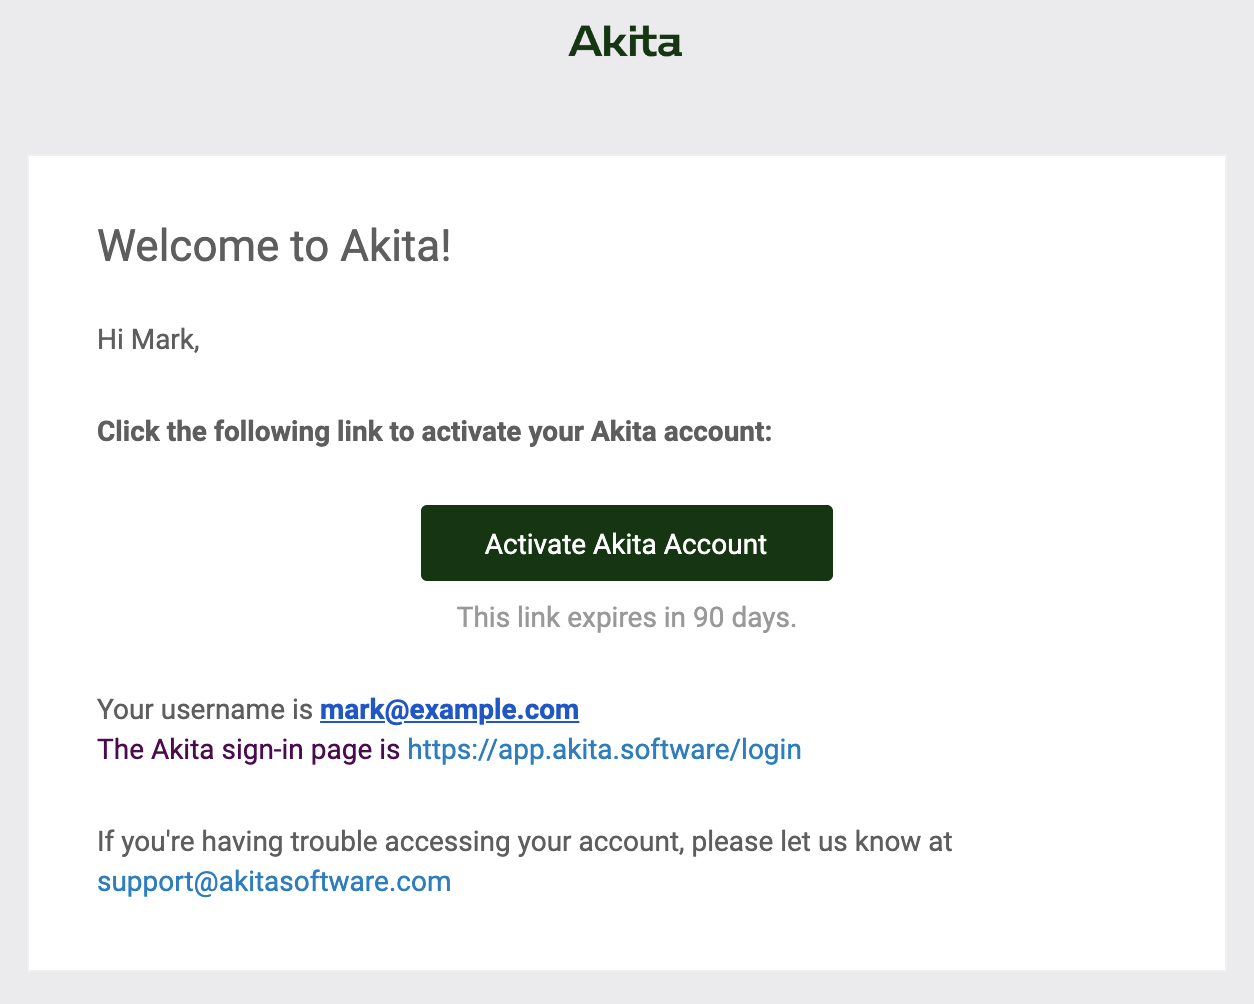
Create an Account
After clicking the "Activate Akita Account" button, your teammate can complete a quick form to set up their password, and then they'll be redirected to login to their new account.
Complete the Invitation
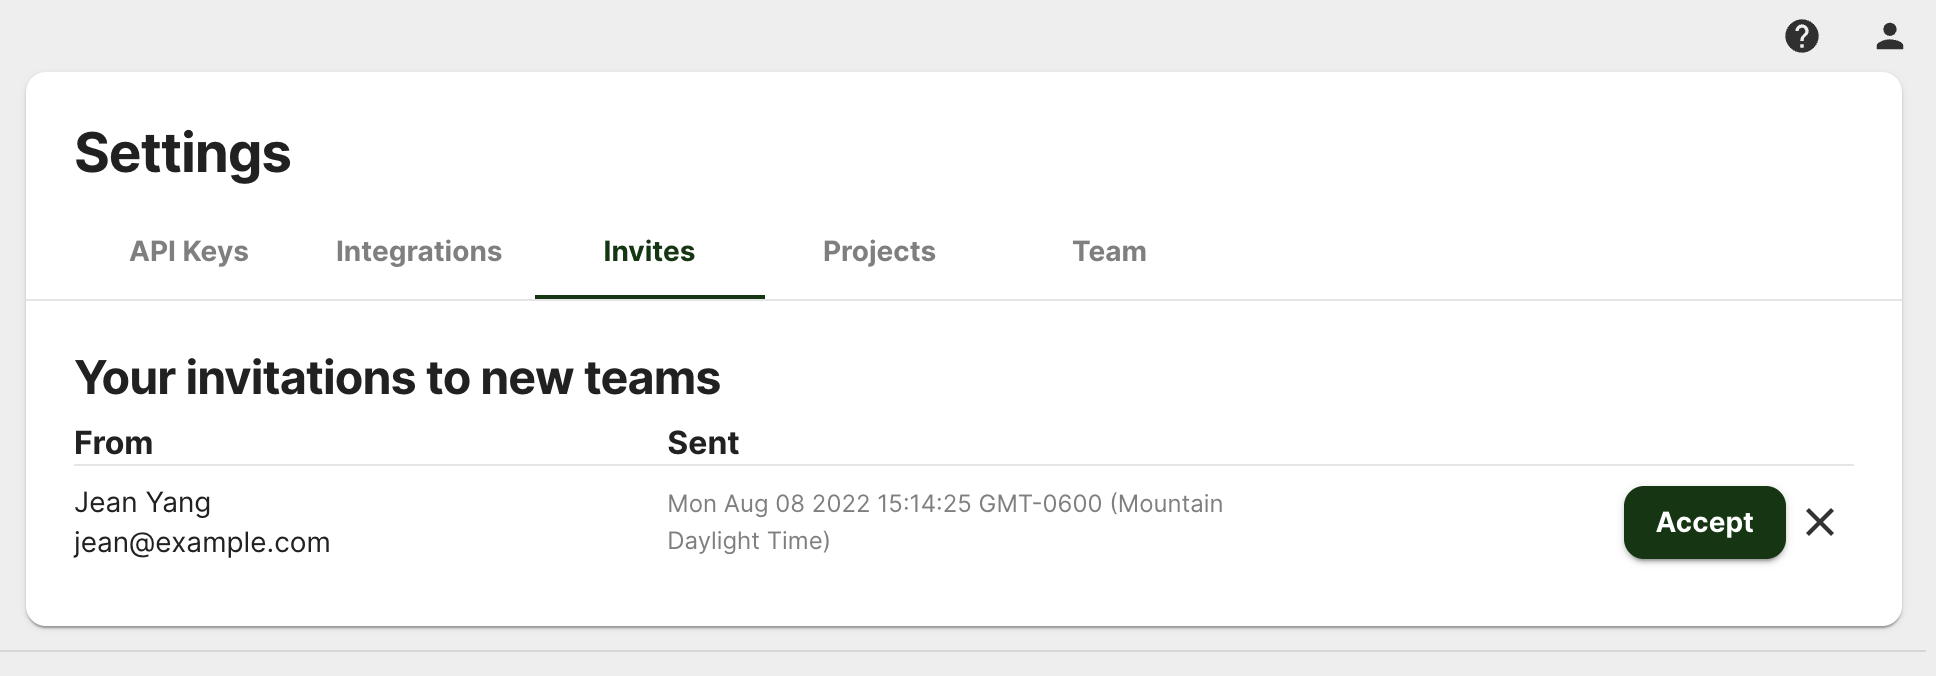
Upon logging in, the invitee will find the invitation to join your team under the "Invites" tab of the Settings page. Once the user clicks the 'Accept' button, they will be added to your team.
Accept an Invitation as an Existing User
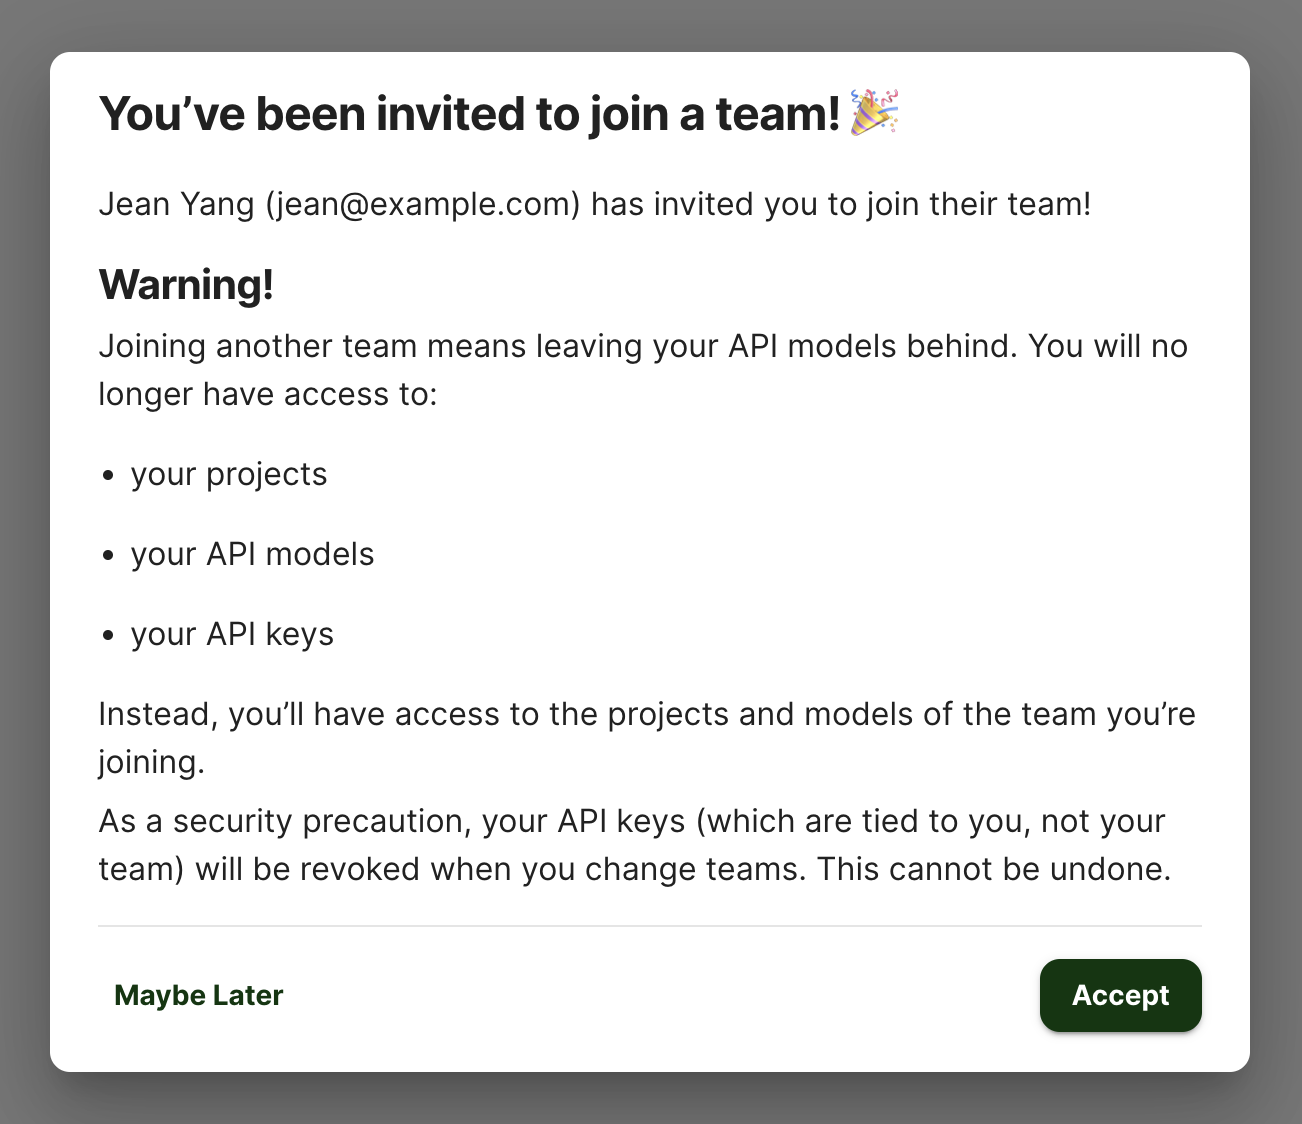
Inviting an existing user to join your team is largely the same as inviting a new user. The user will see their invite under the "Invites" tab of the Settings page. The difference between the two flows is that existing users will be warned about losing access to certain resources.
When users accept this invitation, they will lose access to any Projects, Models, and API Keys created in their previous team. Additionally, any API Keys will be revoked as a security precaution. Users can always postpone accepting an invitation by clicking "Maybe Later."
Updated over 3 years ago